Tag Archives: strawberries

Basic Mille Crêpe Attempt

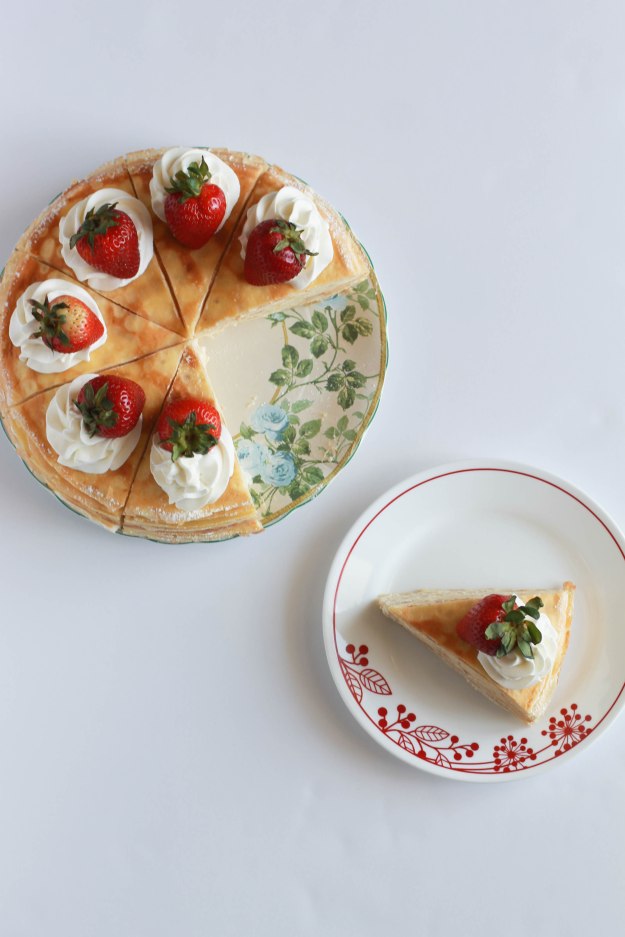
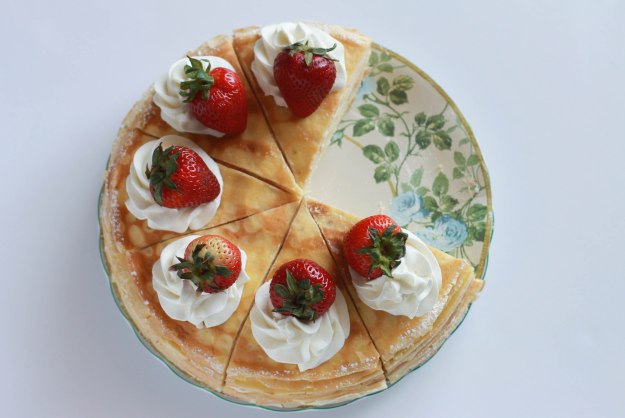
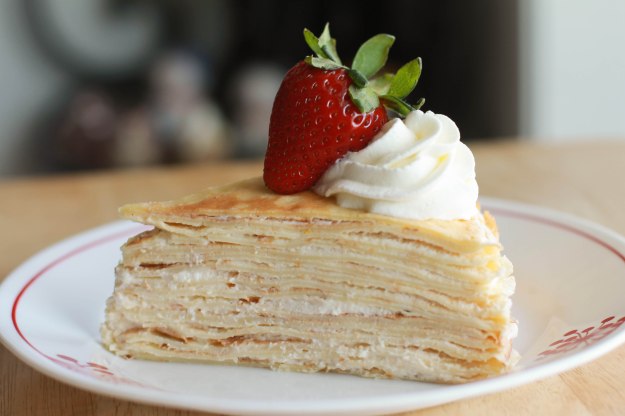
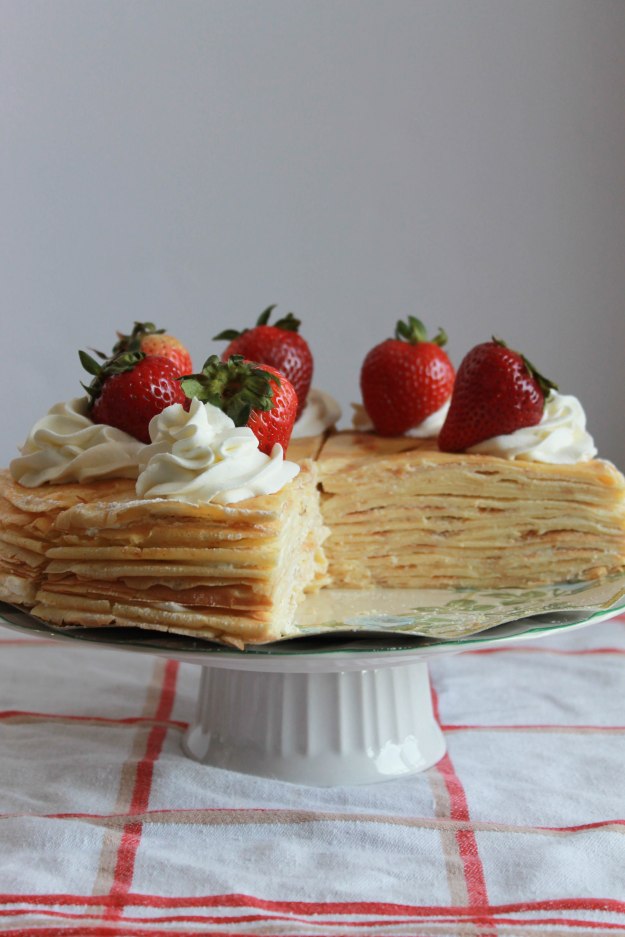
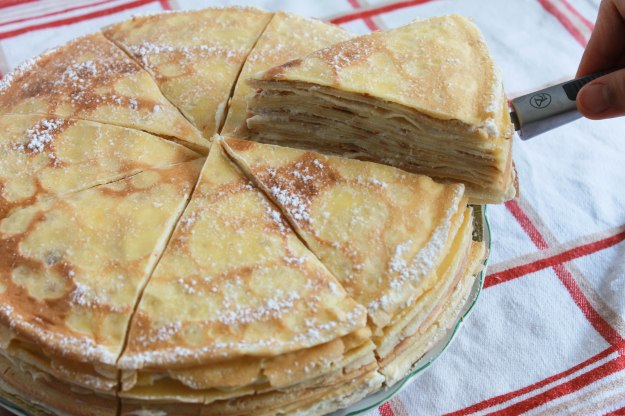
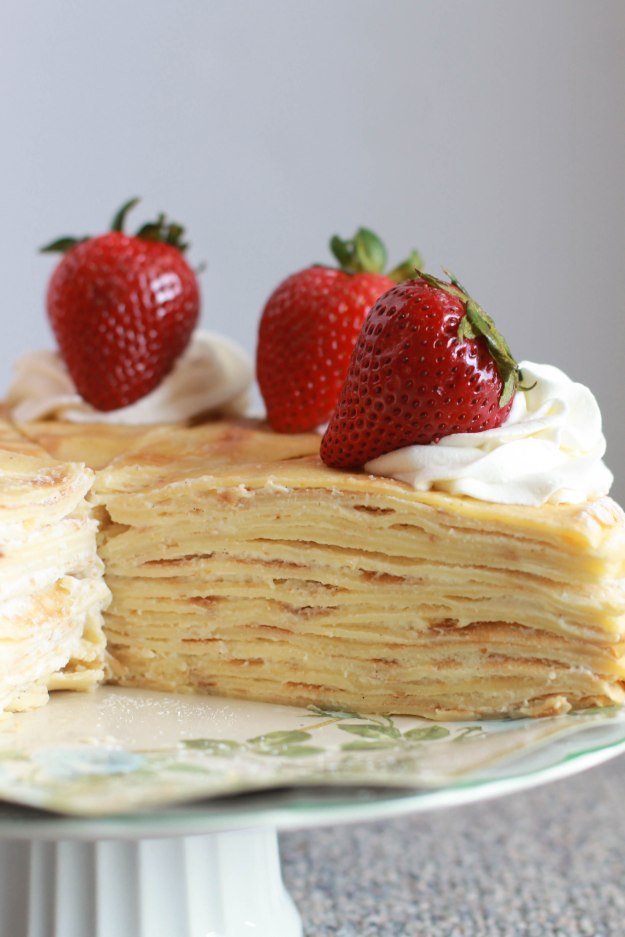
When we said this mille crepe was basic, we didn’t mean drinking Starbucks and listening to Taylor Swift. It’s a classic mille crepe recipe made up of layers of crepes filled with vanilla custard cream in between.

IMG_4876

Mille crepe literally means “a thousand crepes” in French. It’s like a cake, but it’s made with very thin layers of crepes instead. It was something that was on my baking/cooking bucket list for quite a while now, but I didn’t want to attempt making it until I tried a store-bought one. I wanted to make sure I knew what a good mille crepe was supposed to taste like!

IMG_4872IMG_4840

A few weeks ago, I finally got to try the mille crepe from Millie Creperie at Kensington Market. It definitely lived up to the positive reviews I’ve heard about their crepes. Their mille crepe had the right amount of sweetness with a creamy filling. The filling tasted like pastry cream mixed with some whipped cream. Now that school’s over and I’m on the verge of unemployment, I figured it’s about time I try making a mille crepe.

IMG_4859

I used this recipe as a reference for making the cream filling. I highly recommend using vanilla beans or vanilla bean paste for the cream; it makes a huge difference! I also increased the amount of sugar because I felt that the cream wasn’t sweet enough. As for the crepes, I stuck with my go-to crepe recipe. I love the addition of using a citrus zest to the crepe batter as it adds a subtle flavour to the crepe. I tripled the amount of the crepe recipe and added about 3 tablespoons of sugar for a sweet crepe. That yielded me about 16 crepes. I used 15 crepe layers for the mille crepe because I messed up the last crepe. I nibbled on it while dipping the crepe with the remains of the cream filling stuck on the bowl. It was delish.

IMG_4821

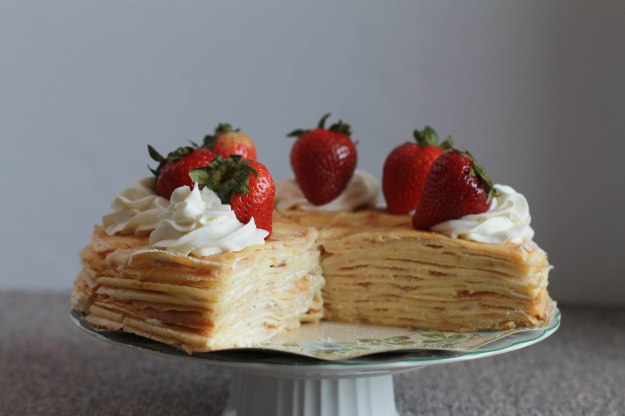
I was initially going to leave the crepes plain with a dusting of powdered sugar, but I ended up garnishing the mille crepe with strawberries and cream.

IMG_4852

Verdict: I really enjoyed the cream filling and it tasted similar to the mille crepe I tried at Mille Creperie. However, I felt like there wasn’t enough cream or perhaps the cream dried up after leaving the mille crepe in the fridge overnight. I’ll have to tweak the crepe-to-cream ratio next time I make a mille crepe again.

IMG_4853

Matchachoco recommended I make a matcha mille crepe next time (of course she would), so that’ll be my next mille crepe attempt!

‘Til the next blog post,

– Ricelessasian

Easter Egg Cake

Spring is here! Here’s a food post I’ve delayed posting for a very long time because I was waiting for Spring.

IMG_7153

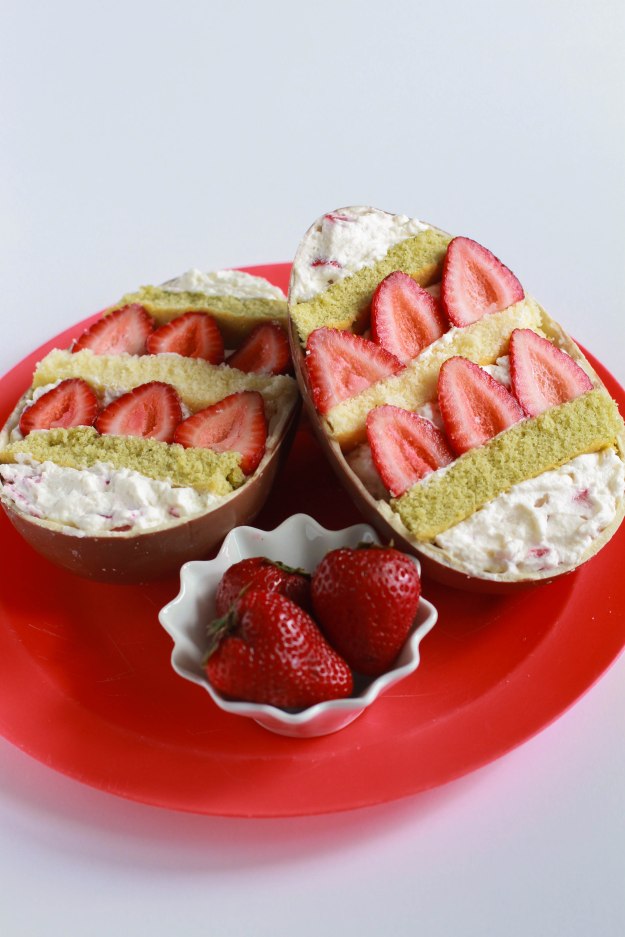
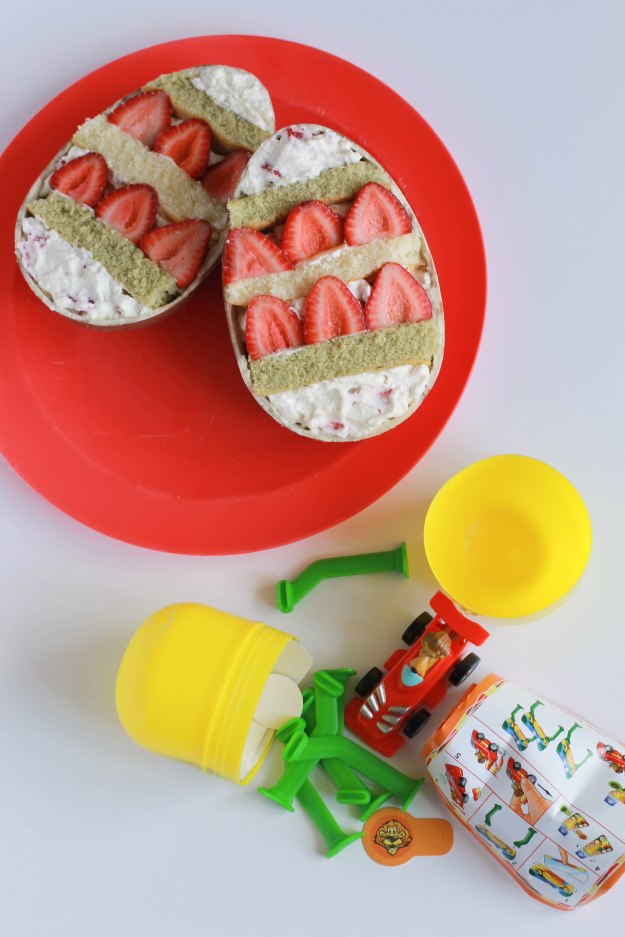
This cake was inspired by a photo of an Easter egg I saw online (does anyone know the original source?). I just knew I had to recreate it the moment I saw the photo! You’re probably wondering how I made the chocolate egg shells. And no, I didn’t use a giant Easter egg mold! The truth is, I made some culinary “shortcuts”. The egg shells are actually a giant Kinder Surprise egg that I split into half.

IMG_7119

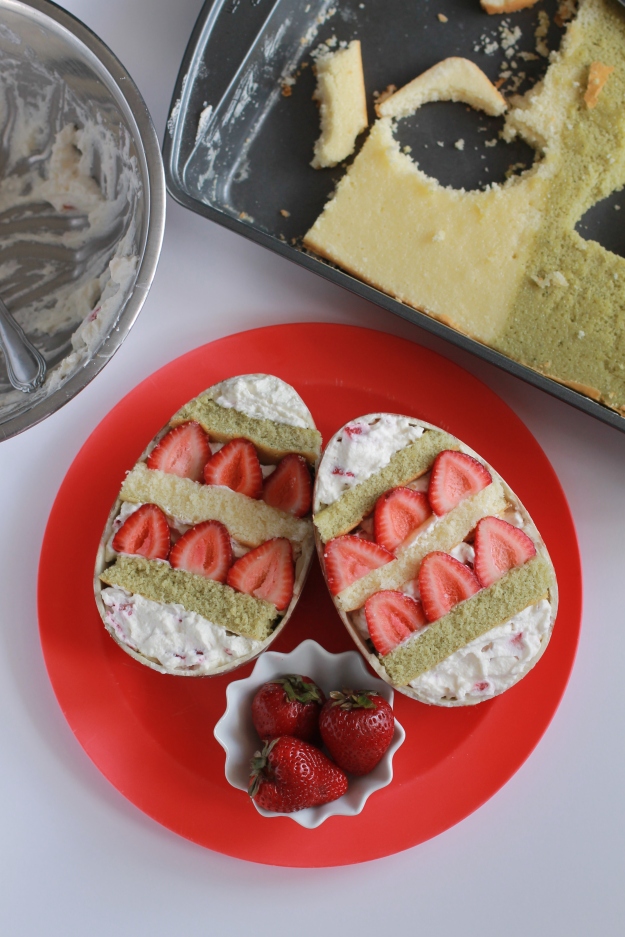
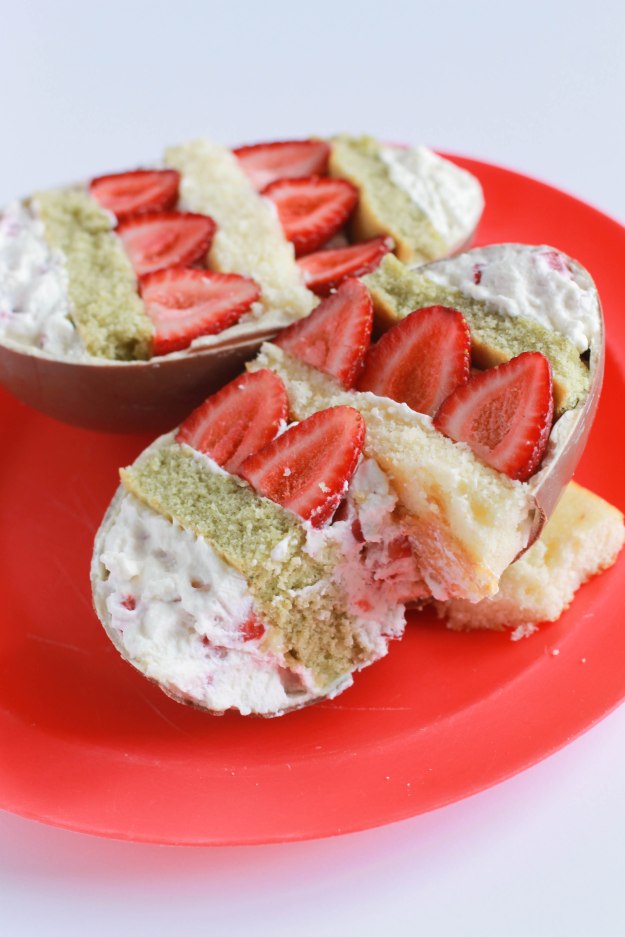
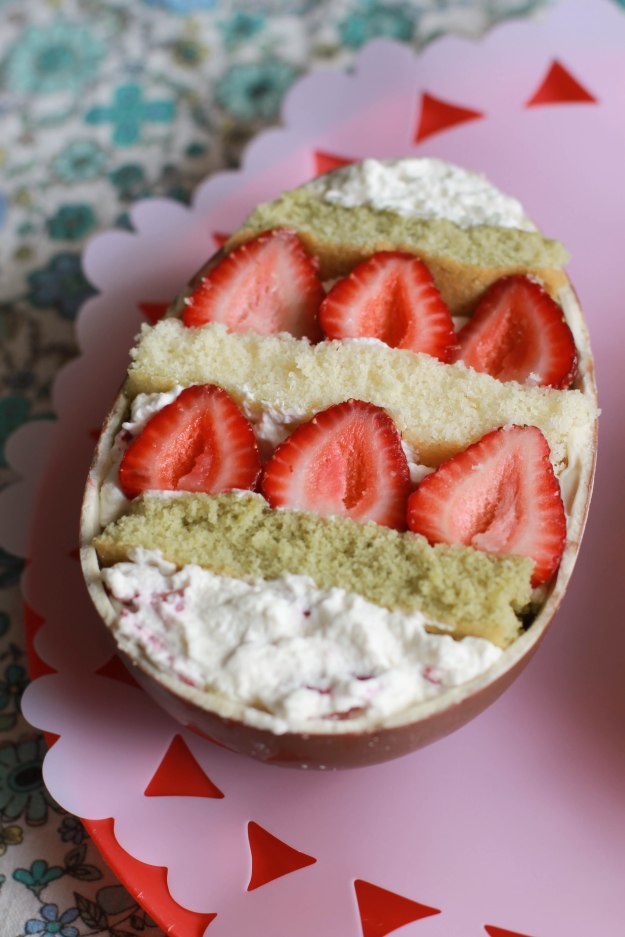
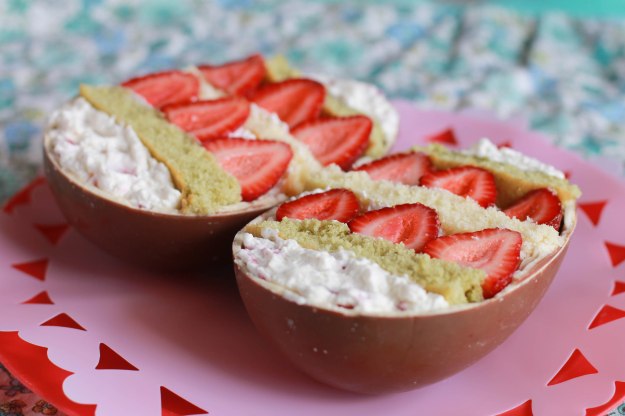
I stuffed the chocolate egg shells with vanilla and matcha sponge cake, along with some sweetened whipped cream and strawberries. Since the chocolate egg shells were already sweet enough, I thought the lightness of the sponge cake and whipped cream complemented the chocolate well. I got the sponge cake recipe from Woodland Bakery. I added vanilla extract to half of the cake batter, and added matcha powder to the other half. Given the history of our previous posts on matcha, we all know that I just HAD to. But of course, you can stuff whatever type of cake and cream you prefer. The beauty of baking is that you get to be creative with the flavours that you make 🙂

IMG_7137

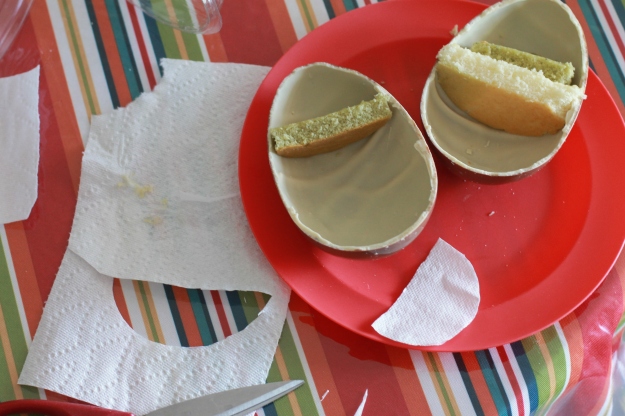
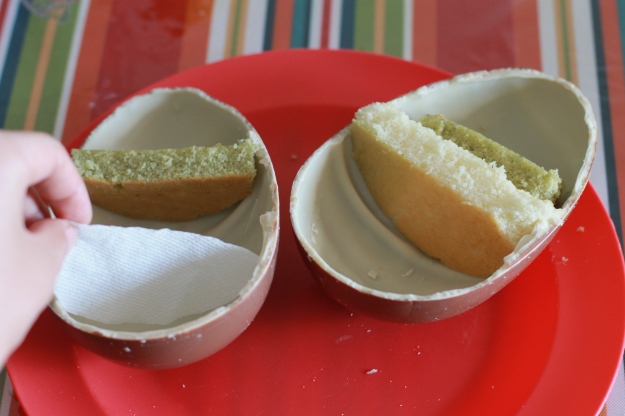
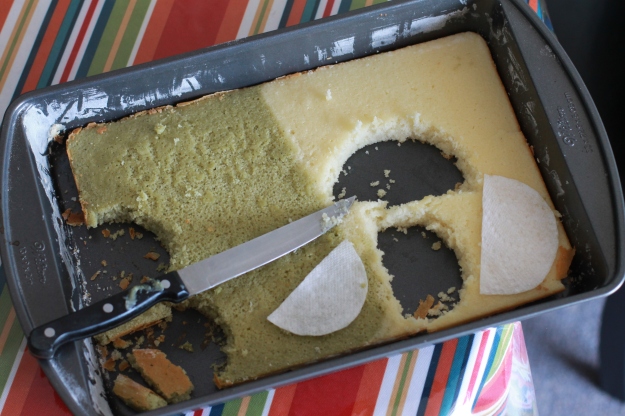
To get the spongecake fit the chocolate egg shells, I made cutouts with paper towels with the shapes I wanted. I didn’t measure anything. I just estimated and checked if the cutouts fit the chocolate egg shells. Once I got the right shape and size, I used the cutouts as a guideline to cut the cake.

IMG_6924IMG_6920IMG_6928

For the filling, I just used whipped cream that was sweetened with powdered sugar. I folded chunks of strawberry pieces into the cream.

IMG_7175-2

I’m just glad I finally got to post this after a long wait 😛 What are you baking for Easter?

IMG_7016

Happy Spring!

IMG_6952

– Ricelessasian

Not Your Typical “Cheesecake”

Guess what’s the main ingredient we used for this “cheesecake” dessert?

IMG_6904

Nope, there’s no cream cheese or any type of cheese used for this recipe at all. This recipe is nuts…literally. It’s mainly made of cashews and walnuts! I’ve been seeing this vegan cheesecake recipe online for a while now, so I finally decided to do my own take on it. While UCL is not a vegan blog, we’re pretty open minded to trying a variety of different recipes. After all, it’s always exciting to try something new!

Technically, this isn’t even a real cheesecake. While this recipe does try to mimic the flavour of cheesecake,  I wouldn’t say that it tastes exactly like cheesecake. But to be honest, I personally like the taste of it 😛

IMG_6737img_6760final

The “cheesecake” layer was made with cashews, lemon juice, honey, and vanilla bean paste, all blended together until a smooth consistency was achieved. Of course the honey can be substituted for maple syrup or agave nectar for a strictly vegan version. I added a bit of chopped fresh cherries to the “cheesecake” to fill more space. The crust was made with crushed walnuts, dates, and a little bit of salt.

IMG_6838

Most recipes call for coconut oil to help stabilize the “cheesecake”, but I find that the recipe still works even if you don’t use it; just don’t thaw the “cheesecake” for too long.  I think what really ‘makes’ this recipe is the vanilla bean paste (and nope, it’s just not the same taste as vanilla extract!) and the smooth consistency of the blended cashews. You have to blend the cashews really well. There’s also the lemon juice which provides a tangy component to this dessert, reminiscent of cheesecake. While this isn’t a low-fat recipe, the good part about this recipe is that you’re getting the ‘good fats’ from the nuts. I wouldn’t recommend eating it all in one sitting, though! Portion is key, or share with a friend 😛

IMG_6894

I finished the “cheesecake” with some pureed strawberries. Another option would be to blend the fresh strawberries with the cashews instead to make a strawberry version. You can also use a combination of different fruits or make a chocolate version. Go nuts with it!

– Ricelessasian

Update: I realized it’s a lot easier to blend the ingredients when I doubled the recipe, so I doubled the amount of ingredients in the updated recipe.

IMG_6827

Basic Vanilla Cashew Based “Cheesecake” *updated* (makes 4 servings)

Adapted from every other raw vegan “cheesecake” recipe I’ve seen on the Internet

Ingredients

“Cheesecake” layer:
1 cup raw cashews
2 tsp. vanilla bean paste
Juice of half to one whole lemon (depends on how sour you want it to be)
2-3 tbsp. honey (or agave nectar or maple syrup)
Water
8-10 fresh cherries, chopped (optional)

Crust:
1/2 cup raw walnuts
4 medjool dates
Pinch of salt

Sauce:
Pureed strawberries (can be sweetened with a little bit of honey or dates if you want it to be sweeter)

Directions

  1. Before blending the cashews, soak cashews in water for at least 1 hour. This step will help ease with the blending process. Drain the cashews from water before blending.
  2. Using a food processor, process walnuts, dates, and salt, just until you get a coarse crumb consistency. Press this mixture to the bottom of two dessert rings or four cupcake liners on a baking tray.
  3. Blend cashews, vanilla bean paste, lemon juice, and honey using the Magic Bullet or a strong powered food blender. Blend until you get a smooth consistency. TIP: If you have difficulty with blending, add some water, but add as little as you can. Pour the mixture on top of the crust. Add chopped cherries while pouring the mixture.
  4. Freeze “cheesecake” overnight. To remove from dessert ring, wipe sides of dessert ring with a warm wet towel. You should be able to remove the “cheesecake” easily by slowly pushing it downwards along the ring. If you used cupcake liners, you can just peel the cupcake liners off. Let the “cheesecake” thaw for about 1-2 minutes before eating. Ideally, the “cheesecake” should still be frozen when you serve it, but not rock solid frozen. Finish with a drizzle of pureed strawberries.

IMG_6911

Frozen Chocolate Covered Banana “Dibs”

These taste just like banana split!

collageIMG_6214

I saw this idea as I was browsing through Instagram and I thought that these would be a great snack to have around in the freezer (also because I wanted to make use of the bananas I have at home before they become overripe). They remind me of those bite-size Dibs frozen dessert but these are made with fruits instead :D.

IMG_6236IMG_6273

I thought of adding freeze dried strawberries to the idea. Although the freeze dried strawberries were intended to be used as a garnish, I was pleasantly surprised that its addition would result with something reminiscent of banana split. If you can’t find freeze dried strawberries, crushed nuts would also work. Better yet, top these treats with both freeze dried strawberries and crushed nuts for the ultimate banana split flavour! I know I would have if I only thought of that idea before taking the photos :P.

Just going bananas,

– Ricelessasian

IMG_6266

Frozen Chocolate Covered Banana “Dibs” 

Ingredients

1 banana
~ 100 g  chopped dark chocolate
Chopped freeze dried strawberries and/or chopped nuts

Directions

  1. Prepare baking tray with parchment paper. Chop banana crosswise into 20 pieces.
  2. Using a ramekin or a small deep bowl, microwave chocolate every 30 seconds, mixing the chocolate in between until it has fully melted.
  3. Using two forks, dip chopped banana pieces one at a time into the melted chocolate. Place chocolate covered banana pieces on top of the parchment paper. Top with a generous amount of freeze dried strawberries while the chocolate has not yet set.
  4. Freeze until the bananas become frozen.  Do not thaw; these taste better frozen!

IMG_6238

Christmas Yule Log Cake (Buche de Noel)

It ain’t Christmas season without some serious baking!

The idea of a Yule log cake has fascinated me since I got into baking as a hobby, and after watching Gretchen’s tutorial from Woodland Bakery, I was finally inspired to make it. After all, roll cakes are easier to make than layered cakes, and what fun is it to dress it up like a log!

img_1158(2)

To make the Yule log stand out, I added edible cake toppers using Santa strawberries and meringue mushrooms. I also added some raspberries. The “Merry Xmas” sign was made with chocolate and white chocolate with freeze-dried strawberries. I like to have all the decorations in my Yule log edible, and what I like about them is that they don’t require artificial food dyes.

IMG_1112

Until now, I’m still so amused with the meringue mushrooms. The ‘dirt’ is actually cocoa powder. You can probably trick people into thinking they’re real mushrooms 😛

IMG_1239

For the roll cake, I used Cooking with Dog’s roll cake recipe as a reference, and substituted the matcha powder with cocoa powder. The cake turned out to be light and not too sweet, similar to those cakes sold in Asian bakeries. Did I mention that Matchachoco and I are huge fans of light Asian style cakes?

IMG_1149

This was my first Yule log attempt, and although it was quite time consuming to make, I really enjoyed making it. I honestly had a difficult time photographing the Yule log as it seems like I can’t find the perfect Christmas-themed background for it. I can’t wait to make another Yule log (maybe next year?), and hopefully by that time, I would have improved the Yule log baking and photography.

Happy baking and happy holidays,

-Ricelessasian

IMG_1217Chocolate Roll Cake
Adapted from Cooking with Dog

Ingredients

4 eggs, whites and yolks separated
1/2 cup sugar
1/2 cup cake flour
1 tbsp. cocoa powder

Directions

  1. Preheat oven to 340 degrees F.  Prepare a 17”x 11” baking sheet with parchment paper.  Grease parchment paper with oil.
  2. Combine cake flour and cocoa powder, and sift them together 2-3 times.
  3. In a bowl, beat egg whites with an electric beater until foamy. Continue to beat, gradually adding half the sugar (1/4 cup), until stiff peaks form.
  4. In a separate bowl, beat together egg yolks and the half of the sugar (1/4 cup) until the egg yolks have increased in volume.  Whisk the cake flour mixture to the egg yolks.
  5. Fold 1/3 of the meringue (whipped egg whites) into the egg yolk mixture until fully incorporated. Do this repeatedly with the rest of the meringue, 1/3 at a time, until fully incorporated.
  6. Carefully spread the batter to the baking sheet with a spatula, making sure the batter does not deflate. Bake for 15-20 minutes, rotating the baking sheet halfway, or until the cake springs back when it is touched.  Make sure you do not overbake or the roll cake will crack when you roll it out.
  7. After baking, immediately transfer the cake to a flat surface and cover it with another baking tray. This will prevent the cake from drying out and maintain its flexibility. Cover until the cake is cool enough.

Chocolate custard cream (used as the filling for the Yule log)
Adapted from Cooking with Dog

Ingredients

2 egg yolks
2 1/2 tbsp sugar
2 tbsp all purpose flour
1 tbsp cocoa powder
1 cup milk, warm
~50 g chocolate
1/2 cup heavy whipping cream

Directions

  1. Sift together flour and cocoa powder.
  2. Pour about 1/4 cup of the milk to the egg yolks, and whisk them together. Whisk the flour mixture. Add the remaining milk, and whisk until fully incorporated. Strain the mixture and transfer to a sauce pan.
  3. Heat the mixture in a sauce pan, continually stirring, until you get a thick consistency. While the custard is still hot, add the chocolate and mix it to the custard until the chocolate fully melts.
  4. Transfer the custard to a shallow bowl.  Cover with plastic wrap, with the plastic wrap touching the top surface of the custard; this will prevent a ‘skin’ from forming on the top surface of the custard.  Refrigerate the custard until chilled.
  5. In a bowl, whip the heavy cream until stiff peaks form.  Whisk 1/3 of the whipped cream to the chilled custard until fully combined. Fold the remaining whipped cream to the custard. Refrigerate until ready to use.

Chocolate Ermine Frosting (used to frost the Yule log)
Adapted from Yoyomax12

Ingredients

1 cup butter
1 cup milk
1 cup sugar
4 tbsp. flour
1/2 cup cocoa powder

Directions

  1. Cream together butter and sugar with an electric mixer. Add vanilla extract. Continue beating until most of the sugar has dissolved.
  2. In a separate bowl, mix together milk and flour. Heat milk and flour mixture in a saucepan over medium heat.  Stir the mixture continuously until the mixture thickens into a paste.
  3. Transfer milk and flour mixture into a bowl and let cool. Stir it occasionally to make the cooling process faster.
  4. Once cooled, add the milk and flour mixture to the creamed butter and beat them together.Add cocoa powder and continue to beat. The frosting should have a light fluffy consistency.

TIP:  If you end up with a runny frosting, refrigerate or put the frosting in the freezer for a few minutes.  Beat the frosting again after taking it out of the fridge until you get a light fluffy consistency.

collage
To assemble the roll cake, spread the filling all over the top surface of the cake. Tightly roll the cake. Wrap the roll cake with parchment paper and plastic wrap, so that it remains tight. Freeze the roll cake.

Once frozen, cut the sides of the roll cake to make it shaped like a log. Attach the sliced parts of the cake to the side and top of the roll cake, using frosting as the glue. Frost the cake with the frosting, copying the texture of a log. Attach the edible designs to the cake, and dust with cocoa powder and powdered sugar.

IMG_1136

Instructions for the santa strawberries can be found here. Gretchen from Woodland Bakery has a very informative tutorial on how to make the meringue mushrooms. She used a Swiss meringue method for making the meringue, but if you don’t have a candy thermometer or don’t want to go through all the trouble of heating the sugar and egg whites, you can use the French meringue method, which is what I usually do when I make meringue cookies.

IMG_0835IMG_0860IMG_1237

Strawberries and Cream Santa

Merry Christmas! 🙂

In continuation with the Christmas themed baking, here are strawberries and cream Santas! I got the idea from seeing these somewhere online, and I thought that they’d make a cute decorative topper for the Yule log I made.

Wishing you a happy holiday,

-Ricelessasian

IMG_1103
IMG_1106IMG_1107IMG_1111IMG_1112IMG_1116

Chill Out

Toronto’s weather has been inconsistent these past few weeks, and on those really hot and humid days, I frequently get cravings for frozen treats. I think I’ve been a little too self-indulgent on creamy types of popsicles and iced coffees lately, so I decided to make my own fruit popsicles for a healthy alternative.

Untitled-1

Don’t the colours look pretty?

The popsicles were made with mangoes, strawberries, and blueberries. The fruits were ripe enough that I didn’t need to add any sweeteners. I used my new popsicle molds and ice candy plastic bags to make the frozen treats. We call these ice candies in the Philippines and it is a popular way to serve them using ice candy plastic bags. They look like homemade Freezies sans the artificial ingredients 🙂

IMG_6146p2

I hope this inspires you to make your own fruit popsicles while summer is still here. I think it’s a cool idea, pun intended.

-Ricelessasian

IMG_6174p2

Layered Fruit Popsicles

Ingredients

3-4 very ripe Indian mangoes
1 pint very ripe strawberries (choose strawberries that are almost overripe)
1 pint ripe blueberries
Water (optional)

Directions

  1. Puree mangoes, strawberries and blueberries individually.
  2. Fill one third of the popsicle mold or ice candy plastic bag with the mango puree. Layer this with the strawberry puree then the blueberry puree. The fruit purees will not mix easily with each other because they are viscous. If you’re using an ice candy plastic bag, you might want to add a little bit of water to make the fruit puree more pourable.
  3. Freeze until ready to serve.

Reduced Strawberry Purée

Here’s a very useful base recipe. Use this reduced strawberry purée as an addition to salad dressings, frostings, cake batter etc. By reducing strawberries, you reduce the water content of the strawberries, leaving you with a concentrated strawberry paste. It’s different from strawberry jam because it does not contain additional sugar. You can try this method with other berries as well.

– Ricelessasian

IMG_5004

Reduced Strawberry Purée (yields about 1/2 cup to 3/4 cup)

Ingredient

1 pint of strawberries (frozen strawberries could also be used)

Directions

  1. Purée strawberries in a food processor.
  2. Transfer strawberry purée to a saucepan and heat over low-medium heat. Occasionally stir strawberry purée so that it does not burn at the bottom. Continue to do this until the strawberry has reduced to a paste-like consistency (takes about 30 to 45 minutes).